
Make your Home Server using Dynamic DNS
The purpose of this article is to explain about Dynamic DNS and it’s usage. I’ll walk through by setting up Dynamic DNS system for your server.
What is Dynamic DNS and how it works
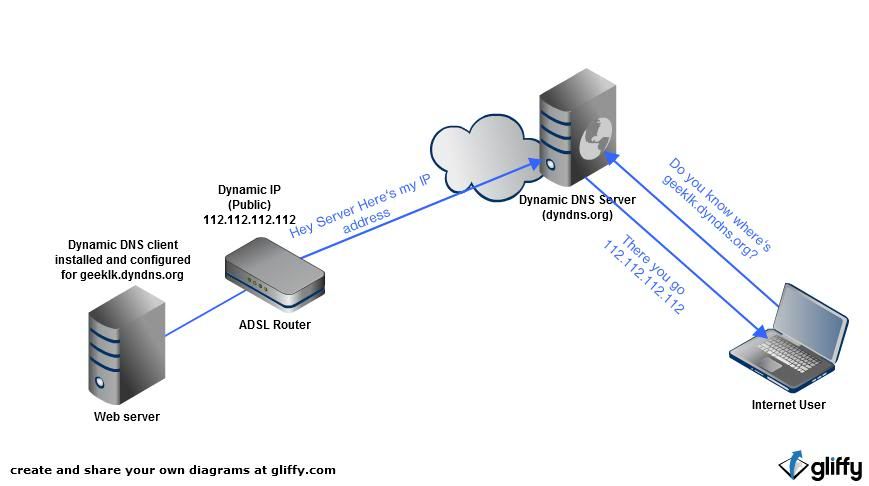
In short it’s the replacement for the requirement of static IP. First you need to understand how DNS works, check out this article. Most of the time home users and small businesses don’t have static IP addresses as it’s expensive. Once we subscribe with a Dynamic DNS service providers such as DynDNS, No-IP we can create a domain name like “geeklk.dyndns.org”. And we need to download and install the Dynamic DNS update client and it will update the current IP address to the Dynamic DNS server. Refer the image below. Whenever someone request the domain name, Dynamic DNS server will respond with the current IP address. So we have static like access to our network.
What Server?
It can be anything. If you want to setup a web server try XAMPP for windows, You can setup a File Server where you can save your data and access from anywhere or setting up and IP Camera or DVR device to watch your place :). Make sure to forward relevant ports for the local machine from the router.
Dynamic DNS walk through
Go to www.no-ip.com and register a free account. DynDNS is no longer offering free service 🙁
Once you logged in, select Add a Host.
Enter your desired host(domain) name and select .no-ip.biz or whatever you like.

And create host. Don’t worry about other options.

Now the domain that we created will be listed on next page.

Next step is to download the client and install in your PC or Server.
Note: Many routers supports Dynamic DNS options. So no need to download any client. We need to enter the correct credentials and we’re done.
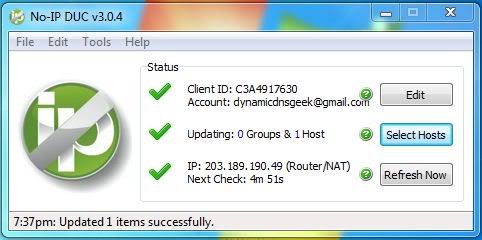
Start no-ip client and login. Once you logged in select Select Hosts.
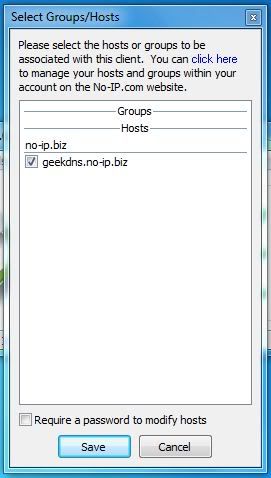
Now the domain that created will be listed here. Select the domain and hit Save.
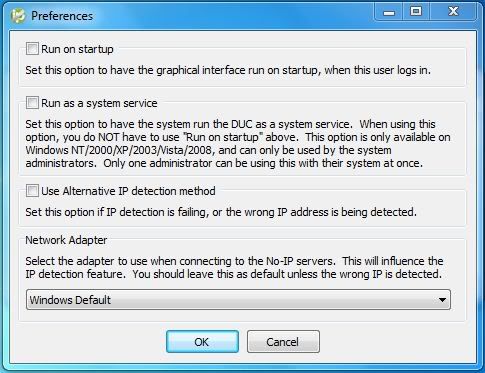
Set the client to start on windows status by File > Preferences > Check first two options.
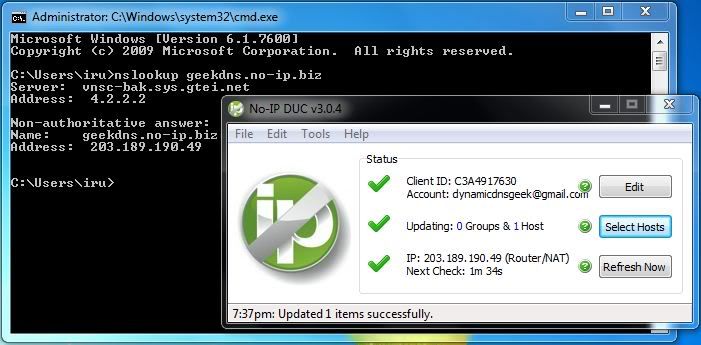
That’s it. Now testing time.
My So.cl Experience [Geeklk exclusive]
USB Tethering with Windows XP :: Android

I need a fantastic place to host our blog, do you know of any?
I recommend you hostgator.com